The Viking Horde grows ever stronger!
Thought I would post a couple of pics after I dug out all my Vikings / Saxons / Dark Age Villagers etc to see what I had.
I was surprised to find I now have over one hundred and twenty painted Vikings! These are mainly Foundry but there are a mix of Artizan, Gripping Beast and Black Tree too.
Above we have the proud leaders of this horde - the old man, Thoruiv 'the Flatulent' and his eldest sons Jarl Ragnar (on the left) and Jarl Grim (on the right). In the background are the berserker Rurik 'the Restless', Sonja 'Queen of the Hill' and 'Big' Bergfinn, brother of the now deceased Bergthor.
Here we have Brother Thomas and some dogs leading some local down-trodden villagers and below are Kraki, Gudrød the Hunter, with Ingulbjörn behind them and the insane old berserker Folkmar in the foreground.
Next is a pic of Thoruiv and his 'berserker' personal guard, with Rurik and Folkmar.
Lastly, a shot of the entire horde including one hundred and twenty plus Vikings, seventy 'Saxons' and twenty odd villager types.
On the workbench, I still have about another twenty Vikings in progress, plus the original batch of villagers and animals that I never finished! Once these are done I also have about another seventy or so unpainted Vikings. As I only ever really intended to play skirmish games I doubt they will get painted up in the near future as I have plenty to occupy my time with Doctor Who and 7TV stuff...see my Level 2 blog.
Showing posts with label Rurik the Restless. Show all posts
Sunday, 12 May 2013
The Viking Horde...
Labels:
Artizan,
Black Tree Design,
Brother Thomas,
Citadel,
Crusader,
Folkmar,
Foundry,
Grim,
Gripping Beast,
Ragnar,
Rurik the Restless,
Saxons,
Thoruiv,
Trent Miniatures,
Vikings,
Villagers,
Workbench Update
Thursday, 28 March 2013
Battle of Deadlane Grove.
Sending out his trusted lieutenant “Big” Bergthor with a force of well-trained warriors and Hird, along with Rurik and his band of berserkers, who were still lusting for another fight.
They had not travelled far when they arrived at a large clearing; the main features a small copse to the right, a low hill in the centre and an old stone circle burial site to the left. Clearly this was a place of some significance to the locals, indeed, it was sacred ground.
Cautiously moving forward, suddenly a battle cry rang out and the glinting sword and spear-points of Ealdorman Torel’s men could be seen across the clearing…
![]() |
| Ealdorman Torel (centre) and his force arrive in the clearing. |
![]() |
| "Big" Bergthor (centre) and his men shout across the battlefield! |
![]() |
| This is Sacred Ground. |
![]() |
| Rurik works himself into a frenzy to encourage the warriors around him. |
![]() |
| Ealdorman Torel marches towards the hill... |
![]() |
| ...and secures the base of this to await the Viking raider approach. |
![]() |
| Shouting and singing, the Vikings charge across the open ground to the stone circle and low hill. |
![]() |
| Bergthor's Hirdmen and Bondi are greeted by the the Anglo-Dane forces... |
![]() |
| ...and a tough melee ensues with Bergthor in the thick of the battle! |
![]() |
| Torel stands firm as some of his Ceorl are pushed back from the summit. |
![]() |
| Tense fighting continues with losses on both sides but Torel cannot push the raiders from the bottom of the hill. |
![]() |
| Rurik belows obscenities as he secures the stone circle with his berserkers and warriors in tow! |
![]() |
| Sonja, the "Queen of the Hill", sends the Anglo-Danes scurrying from the summit of the hill. |
![]() |
| Another desperate attempt to stop the Viking Warlord fails and Bergthor shouts after the fleeing Huscarl, but... |
![]() |
| ...the final epic battle sees both Warlords, Bergthor and Torel, killed. Jorund "Redbeard" claims the final blow on Torel. |
![]() |
| "Stuff this for a game of soldiers - lets get out of here!" |
The Anglo-Danish force knew they could no longer win this fight – gathering their wounded the battle weary men slowly dispersed into the surrounding woods.
Rurik looked on with a huge grin over his scarred face. The flank was secured and this was a crushing blow to the moral of the defenders. The passing of brave “Big” Bergthor to the drinking halls of Valhalla would be sung about for the rest of history…
![]() |
| Rurik and the men celebrate the hard won victory! |
![]() |
| Self-proclaimed "Queen of the Hill" Sonja and "Chief Jorund Redbeard" get a little bit too big for their boots... |
![]() |
| Rurik will certainly have something to say about it when he reports back to Jarl Ragnar. |
Viking Raiders (Andy)
"Big" Bergthor
1 unit of Hirdmen (4 x Hearthguard including Sonja, Hrefna and Sverting)
1 unit of Berserkers (4 x Hearthguard under Rurik "the Restless")
2 unit of Bondi (16 x Warriors including Jorund "Redbeard")
Anglo-Danish Defenders (Rob)
Ealdorman Torel
1 unit of Huscarl (4 x Hearthguard with Dane axes)
1 unit of Huscarl (4 x Hearthguard)
2 units of Ceorl (16 x Warriors)
After a long break I finally dug out the Vikings again and we set up for a small 4 point a side Saga battle playing the Sacred Ground scenario. Andy (the Zombie Master / Ant Master…) took control of the Viking force this time whilst Rob went back to the Anglo-Danes. We decided on no levies in this game.
The first round involved nothing more than both sides moving forwards. Rob moved first and edged the majority of his force towards the central hill, with a unit of Ceorl aiming for the stone circle. Andy shrugged off some fatigue placed on him via Robs battleboard and then steadily moved his force forwards keeping a line formation. (Points – Rob: 0 Andy: 0)
Round two and Rob managed to get his first units of Huscarl, warriors and warlord (Ealdorman Torel) to the bottom of the hill. Andy replied in a similar fashion and managed to get some Hirdmen and warriors to the opposite side. Still no combat! (Points – Rob: 11 Andy: 5)
Round three and Rob consolidated his force on the top of the small hill – two units of Ceorl, a unit of Huscarl and his warlord. The other unit of Huscarl remained to the flank. Andy was now ready for battle and launched a unit of Bondi with his warlord (Big Bergthor) into Rob’s warriors. A devastating combat left four dead Anglo-Danish Ceorl and two dead Viking Bondi. (Points – Rob: 13 Andy: 11)
Round four and the fighting continued. Rob attacked Andy’s exposed warlord with his own warlord and a unit of Huscarl. Big Bergthor shrugged off the assault killing two of the Ealdorman’s Dane-axe wielding Huscarl in the process! Another unit of Robs Ceorl charged into the Viking Bondi at the bottom of the hill but were forced back with one casualty on each side. Finally Rob sent his second unit of Huscarl to attack Big Bergthor from the rear. Result, another Anglo-Dane corpse. Andy’s move and Rurik and his berserkers occupied the stone circle. Next, three Hirdmen (well, one Hirdman and two Hirdwomen) then charged Robs unit of Ceorl on the hill and an epic combat ensued. As the slaughter ended only the proud “Queen of the Hill” Sonja stood atop the hill, her companions Hrefna and Sverting lying injured beside her and the corpses of four Anglo-Danes next to them. The remaining Ceorl fled to the bottom of the hill. (Points – Rob: 8 Andy: 15)
Round five and Rob surveyed his battered forces. Realising his only option was to keep on the attack his brave warlord charged into combat against the unit of Bondi at the foot of the hill followed by his two remaining Dane-axemen. This proved successful and the Viking Bondi retreated leaving behind four warriors to enter Valhalla. Robs sent his other three remaining Huscarl back to fight Big Bergthor again resulting in another dead Anglo-Dane and the other two fleeing the battlefield with Bergthor shouting after them. Andy moved his second unit of Bondi into the stone circle. He then turned his warlord to attack the two Dane-axemen. A shocking result left the two axemen dead but also saw Bergthor brought down by their blows! Finally, fired up by the sight of their huge leader felled, three Bondi charged into the Anglo-Dane warlord, now alone on the top of the hill. Two warriors were killed by the brave Ealdorman Torel but he himself dropped to the ground with the point of a Viking sword in his belly – back to the mud. “Redbeard” Jorund celebrated and proclaimed himself the new chief but it is doubtful Rurik would be allowing this any time soon… (Points – Rob: 3 Andy: 10)
At this point it was pretty clear Rob could not turn the battle back in his favour and conceded defeat. All that remained of his force were two units of Ceorl (one of three and the other four) plus two fleeing Huscarl. Andy still had a full unit of Bondi and berserkers plus the proud, self-proclaimed “Queen of the Hill” and “Chief Jorund Redbeard”.
(Final Points - Rob: 35 Andy: 41)
Another good game of Saga that saw the Vikings come out on top (again) – we felt the lack of missile troops may have hindered the Anglo-Danes but ultimately, despite some good tactical play Rob did not have the dice gods with him and Andy managed to make good use his own battleboard abilities and the potentially risky strategy of sending his warlord into the thick of things paid off.
![]() |
| "The Cast" f/r - Jorund "Redbeard", Rurik, "Big" Bergthor and Sonja. |
Wednesday, 15 August 2012
Skirmish at Thorringhall Wood.
After recovering from his injuries, Jarl Ragnar and his faithful bodyguard Rurik retreated from Arlesford to set up camp in Thorringhall Wood. Here they hoped to lick their wounds and await reinforcements from Ragnars brother Otrygg.
Whilst passing through the warband stumble across a hamlet in a clearing in the trees - as they approach the outskirts they see an ancient shrine to the battle slain, unaware that they have already been spotted and followed by the Saxon militia of Thorrington (near Alresford) under the command of ageing Ealdorman Tunberht.
The Saxon forces looked on in horror as their leader fell to the ground - within moments they began to flee into the surrounding woods.
Ragnar congratulated Rurik on the well won victory. The warband were organised and guards posted. Tonight his men would sleep under thatched roof and dine on pork belly!
Forces
Viking Raiders (Rob)
Jarl Ragnar
1 unit of Hirdmen (4 x Hearthguard)
1 unit of Beserkers (4 x Hearthguard)
1 unit of Bondi (8 x Warriors)
1 unit of Thrall (12 x Levy)
Anglo-Saxon Defenders (ZM)
Ealdorman Tunberht
1 unit of Huscarl (4 x Hearthguard)
1 unit of Ceorl (8 x Warriors)
1 unit of Gebur (12 x Levy)
Whilst passing through the warband stumble across a hamlet in a clearing in the trees - as they approach the outskirts they see an ancient shrine to the battle slain, unaware that they have already been spotted and followed by the Saxon militia of Thorrington (near Alresford) under the command of ageing Ealdorman Tunberht.
View of the hamlet from the North showing the Church of Saint Harry Harrison.
View from the East with Ealdorman Tunberht's abode.
View from the South and Jarl Ragnar's approach.
The old pagan worship site of Jymdegrizz. A tribute to the dead.
Ealdorman Tunberht assembles his men.
Ragnar approaches the hamlet with Rurik in the background.
The Saxons make slow progress...
...and Ragnars drunken thrall cautiously move alongside the pathway...
...as his bondi move through the edge of the forest with Ruriks beserkers in tow.
The Saxon ceorl move through the hamlet.
After sporadic bowfire between the sides, neither seems willing to commit to battle.
A face off begins across the hamlet as Rurik leads his men to the Saxons flank.
Ruriks beserkers and Tunberhts huscarl rain blows upon one another...
...and Rurik lets out a bellow as he cuts down Ealdorman Tunberht!
The Saxon forces looked on in horror as their leader fell to the ground - within moments they began to flee into the surrounding woods.
Ragnar congratulated Rurik on the well won victory. The warband were organised and guards posted. Tonight his men would sleep under thatched roof and dine on pork belly!
Forces
Viking Raiders (Rob)
Jarl Ragnar
1 unit of Hirdmen (4 x Hearthguard)
1 unit of Beserkers (4 x Hearthguard)
1 unit of Bondi (8 x Warriors)
1 unit of Thrall (12 x Levy)
Anglo-Saxon Defenders (ZM)
Ealdorman Tunberht
1 unit of Huscarl (4 x Hearthguard)
1 unit of Ceorl (8 x Warriors)
1 unit of Gebur (12 x Levy)
We fought this quick Saga battle that ultimately only lasted four turns! We played the '"Clash of Warlords" scenario with 4 point warbands.
Despite continuously moving forward to meet his adversary ZM had trouble getting his Saxon levy into the action and they spent most of the game crossing the fences in the hamlet. Robs viking raiders attempted a flanking attack but ultimately withdrew when faced by the relentless movement towards them of the Saxons. Rob began to retreat and ZM followed and gave a good chase but neither side was really able to commit to battle. After some moving too-and-fro and some sporadic bow fire causing some casualties, Rob managed to get his beserkers (under Rurik the Restless) to move to the Saxons exposed flank. Spotting this, ZM gave a manic charge into the oncoming beserkers with a handful of his Huscarl. In the ensuing combat, the beserkers came out on top and poor Tunberht was cut to pieces despite the heroic sacrifice of two of his bodyguard, ending the game. This was ZM's first game of Saga and to be honest he fared well despite being unable to use many of the abilities on his battleboard. Rob had learned from our first encounter and used the beserkers to good effect (unlike I had, where they were frustratingly held on the wrong side of the river!) and the flanking attack drew ZM and his best troops to fight. The dice-gods were with him today!
Tuesday, 17 April 2012
Battle at Alresford Creek. (Part Two)
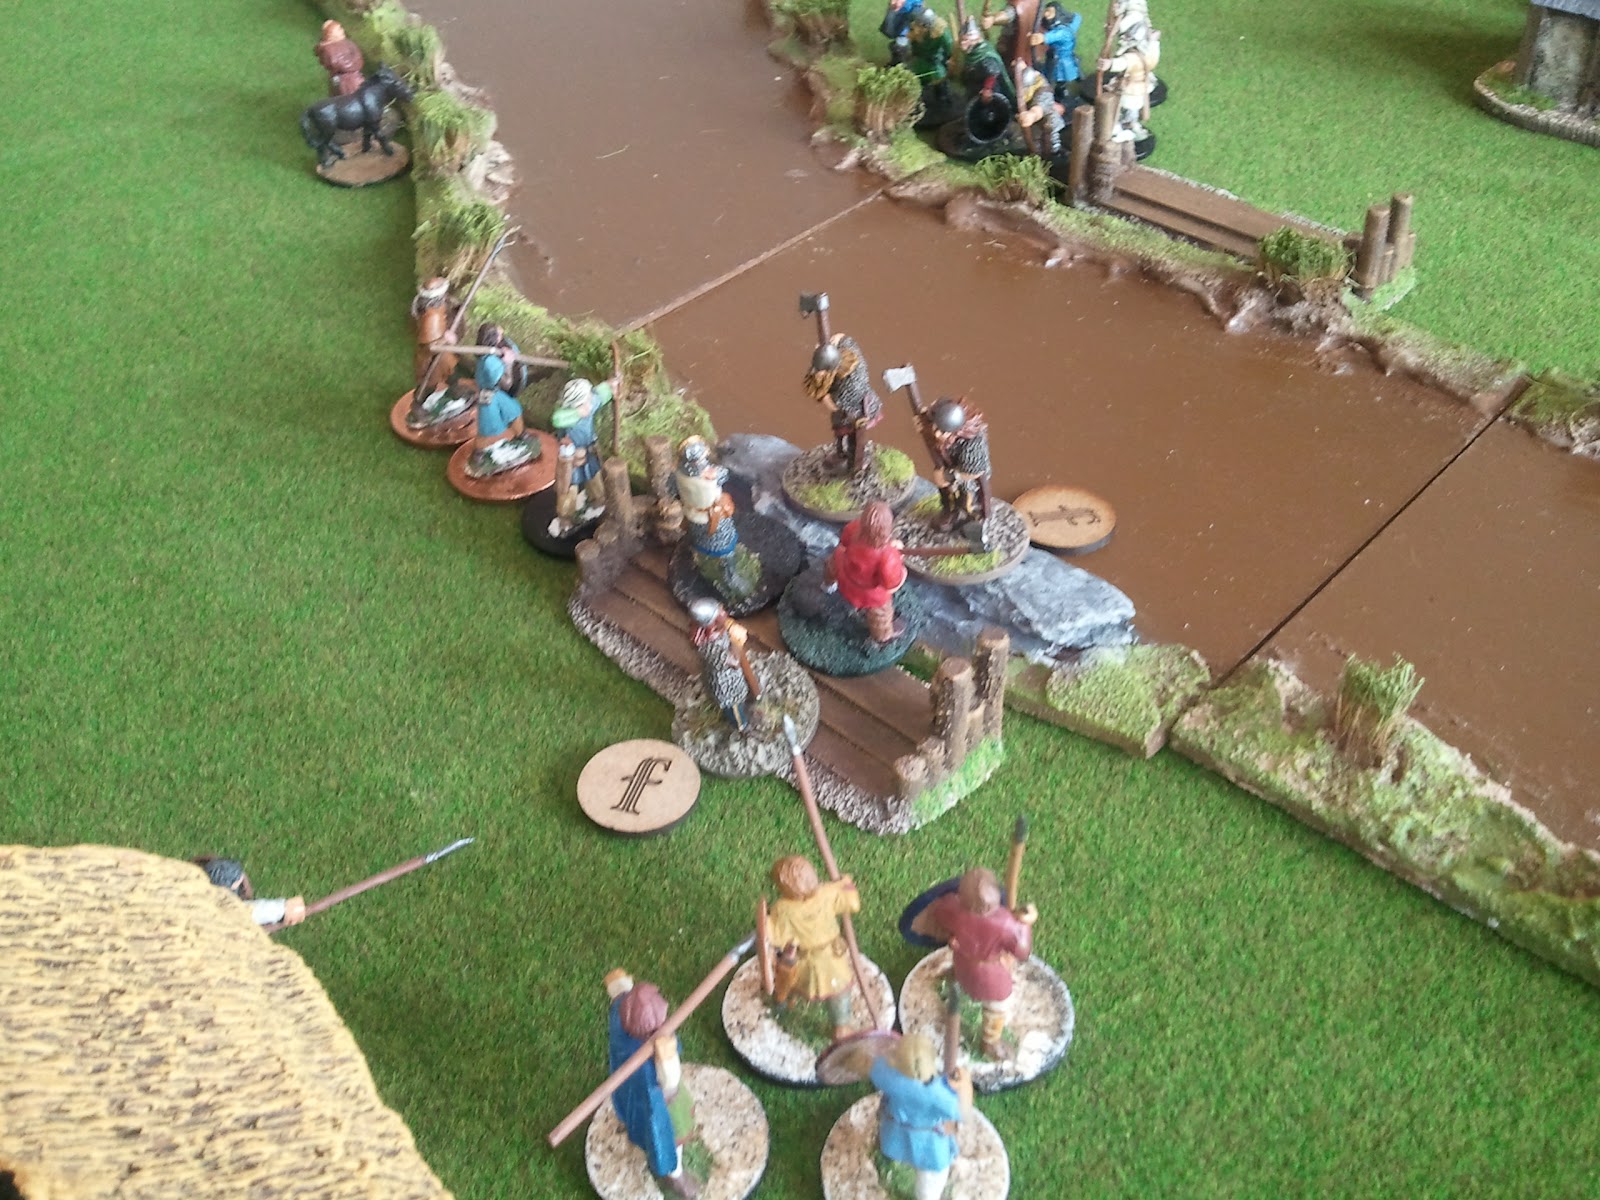
Battle rages across the village on the two crossings at Alresford...
Brother Thomas stands with 'Gwen' outside the front of Saint Cedds. He calls across to Brunhild to flee with her boy Aldin and the dogs.
Ealdorman Aescwulf charges across the field to support his men at the ford. The sudden rush of the angry hirdmen of Jarl Ragnar has caught them unprepared and they are in danger of being forced back.
As the hirdmen decide to stand fast and await the inevitable clash with Aescwulf, the levy on both sides continue to rain arrows down upon each other. Two more of the Viking thrall fall to the ground. Ealdorman Aescwulf charges into the awaiting hirdmen and an epic battle ensues ending with hirdman Eyjolf going to meet his comrades in the 'corpse-hall' and two of Aescwulf's men slaughtered. The Vikings hold firm and the Ealdorman disengages to prevent more bloodshed.
Things are also looking bleak for the Angles on the north bridge - despite a courageous fight the Anglo-Danes cannot hold the might of the attacking Norsemen and are forced to retreat to the western edge of the bridge.
The Viking bondi are now fired up! Encouraged by the yelling of Rurik the Restless not far behind them, the Viking warriors make a second charge into the battered ceorls and the bridge soon runs red with the blood of Angles.
The battle weary men on both sides begin to feel the effect of the drawn out combat over the crossings - two more of the brave defenders are put to Viking sword and axe.
The lone ceorl is desperate to stand his ground but cannot hold it alone. There is little the Alresford levy can do as they watch the Viking raiders make their way to the western bank of the river.
Back at the ford to the south another titanic struggle is about to unfurl. Aescwulf jumps back into battle with his Danish axe wielding bodyguard and tries to alter the course of the battle back in his favour.
An Anglo-Danish Ealdorman challenging the three hirdmen to combat is more than the Vikings can resist - axes are raised on both sides and battle ensues! It is swift and bloody, no quarter is given by either side. Aescwulf proves his prowess in battle and Otrygg and Unnulf are soon making their way to Valhalla. The lone, battered Hrafnvartr is forced to concede ground and carefully backs off, wading through the shallow waters of the ford.
The desperate fighting has begun to weigh heavily all across the battlefield. Ealdorman Aescwulf wants to move on after the raiders but his men are weary. At the bridge crossing, two more of the bondi fall by the wayside, exhausted from their last exertions. The last three shattered bondi cross the threshold of the bridge onto the western side of the river. Even so, the last remaining ceorl is in no fit state to face them and oncoming beserkers - now apoplectic as their weapons are yet to taste blood!
The will to keep fighting begins to wane on both sides. Though the handful of bondi have made it across the bridge and are followed up by Rurik and his men, they soon realise the battle is approaching a stalemate - Ealdorman Aescwulf has repelled the attack across the ford further downstream. Hrafnvartr is in no condition to face a warlord and two Dane-axe hefting huscarl. The thrall bowmen on the east side of the ford are looking likely to retreat themselves if he does. The Viking raiders have come close to winning the day but it is not to be...
Ealdorman Aescwulf asks Brother Thomas to lead the surviving Angles in a prayer for the fallen. The Vikings had come close to over-running the small village and they had plenty to be thankful for despite the losses.
Brother Thomas stands with 'Gwen' outside the front of Saint Cedds. He calls across to Brunhild to flee with her boy Aldin and the dogs.
Brother Thomas watches from Saint Cedds.
Ealdorman Aescwulf charges across the field to support his men at the ford. The sudden rush of the angry hirdmen of Jarl Ragnar has caught them unprepared and they are in danger of being forced back.
Dunstan and the supporting Ceorl retreat from the ford.
The force of the Viking charge is too much - Dunstan screams at the men behind him to retreat and allow Aescwulf to step forward with his huscarls. The Viking hirdmen pause a moment at the edge of the ford. They realise that the Anglo-Dane leader is fast approaching them with his bodyguard in tow and do not want to be surrounded if they step from the riverbank.
Ealdorman Aescwulf leads the fightback at the ford.
As the hirdmen decide to stand fast and await the inevitable clash with Aescwulf, the levy on both sides continue to rain arrows down upon each other. Two more of the Viking thrall fall to the ground. Ealdorman Aescwulf charges into the awaiting hirdmen and an epic battle ensues ending with hirdman Eyjolf going to meet his comrades in the 'corpse-hall' and two of Aescwulf's men slaughtered. The Vikings hold firm and the Ealdorman disengages to prevent more bloodshed.
Has the battle reached a turning point?
Things are also looking bleak for the Angles on the north bridge - despite a courageous fight the Anglo-Danes cannot hold the might of the attacking Norsemen and are forced to retreat to the western edge of the bridge.
Anglo-Dane warriors put up a good fight but are forced off the bridge.
The Viking bondi are now fired up! Encouraged by the yelling of Rurik the Restless not far behind them, the Viking warriors make a second charge into the battered ceorls and the bridge soon runs red with the blood of Angles.
Fatigue takes its toll...
The battle weary men on both sides begin to feel the effect of the drawn out combat over the crossings - two more of the brave defenders are put to Viking sword and axe.
...and the bridge cannot be held!
The lone ceorl is desperate to stand his ground but cannot hold it alone. There is little the Alresford levy can do as they watch the Viking raiders make their way to the western bank of the river.
Ealdorman Aescwulf challenges the Viking hirdmen.
Back at the ford to the south another titanic struggle is about to unfurl. Aescwulf jumps back into battle with his Danish axe wielding bodyguard and tries to alter the course of the battle back in his favour.
A last desperate fight!
An Anglo-Danish Ealdorman challenging the three hirdmen to combat is more than the Vikings can resist - axes are raised on both sides and battle ensues! It is swift and bloody, no quarter is given by either side. Aescwulf proves his prowess in battle and Otrygg and Unnulf are soon making their way to Valhalla. The lone, battered Hrafnvartr is forced to concede ground and carefully backs off, wading through the shallow waters of the ford.
The last hirdman, Hrafnvartr, is forced back across the ford.
The desperate fighting has begun to weigh heavily all across the battlefield. Ealdorman Aescwulf wants to move on after the raiders but his men are weary. At the bridge crossing, two more of the bondi fall by the wayside, exhausted from their last exertions. The last three shattered bondi cross the threshold of the bridge onto the western side of the river. Even so, the last remaining ceorl is in no fit state to face them and oncoming beserkers - now apoplectic as their weapons are yet to taste blood!
The Vikings finally break through the spirited Anglo-Danish defence at the bridge.
The will to keep fighting begins to wane on both sides. Though the handful of bondi have made it across the bridge and are followed up by Rurik and his men, they soon realise the battle is approaching a stalemate - Ealdorman Aescwulf has repelled the attack across the ford further downstream. Hrafnvartr is in no condition to face a warlord and two Dane-axe hefting huscarl. The thrall bowmen on the east side of the ford are looking likely to retreat themselves if he does. The Viking raiders have come close to winning the day but it is not to be...
************************************
As dusk begins to fall across the bloodstained battlefield and the river clogged with corpses of the slain, Rurik orders for the unconcious Jarl Ragnar to be gathered up and returned to his longship on the River Colne. There will be no feasting tonight.Ealdorman Aescwulf asks Brother Thomas to lead the surviving Angles in a prayer for the fallen. The Vikings had come close to over-running the small village and they had plenty to be thankful for despite the losses.
Subscribe to:
Posts (Atom)